Brooder Temperature Week by Week: Where to Measure It and When to Stop
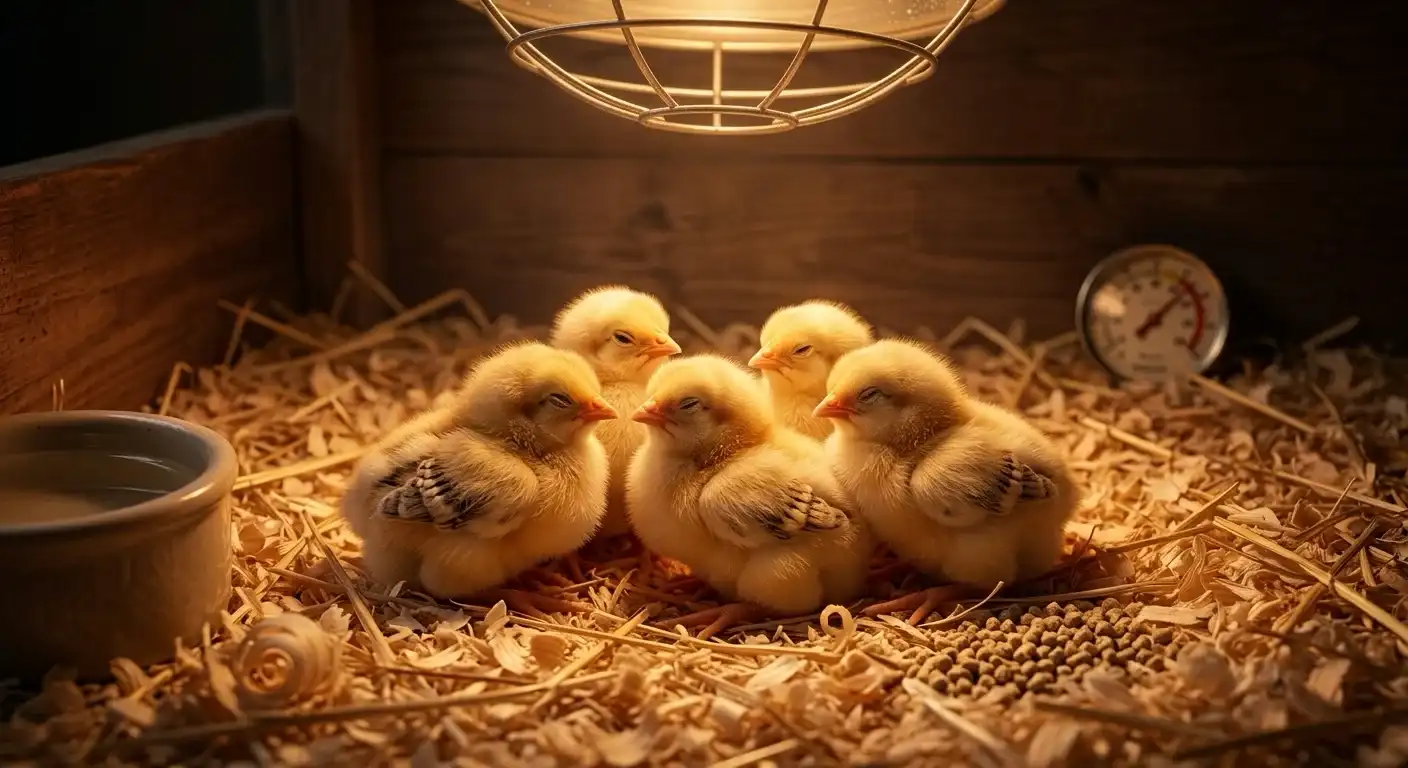
The care sheet says 95. Your thermometer says 95. The chicks are piled in a far corner anyway, peeping like smoke alarms.
Sound familiar? Every fall, this is the scene in garages and laundry rooms across the country. And here’s the thing: the chart isn’t wrong. Neither are the chicks. One number is doing the work of three. The target. The measurement. The bird.
This guide separates them. You’ll get the week-by-week chart, the rules that decide whether the thermometer reading means anything at all, and the signs that the heat is finally done. If the chicks aren’t here yet, the pre-flock checklist covers the brooder setup before they arrive. And for the gear that goes under the thermometer, the brooder starter kit comparison opens six kits piece by piece, then prices the same parts bought separately.
The chart everyone copies
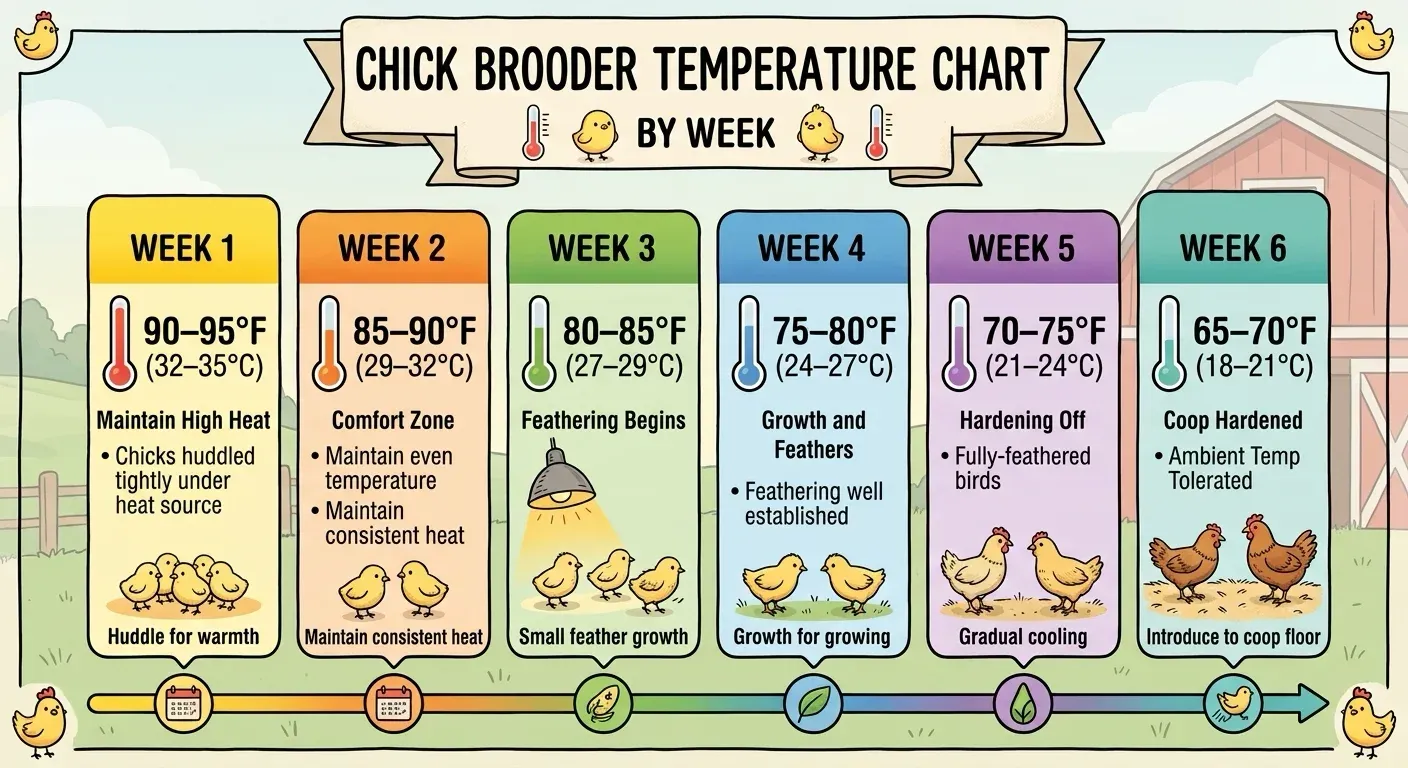
Two extension sources agree on the shape of it. Start hot. Drop five degrees a week. Stop when the birds stop needing it. Penn State’s brooding guide says to supply 95°F at chick level for the first week; the eXtension brooding article gives 90–95°F as the starting band. Readings at those extremes are normal. A cool corner, a slightly high thermometer. Both fine.
| Age | Target under the heat source |
|---|---|
| Week 1 | 90–95°F (32–35°C) |
| Week 2 | about 85–90°F (29–32°C) |
| Week 3 | about 80–85°F (27–29°C) |
| Week 4 | about 75–80°F (24–27°C) |
| Week 5 | about 70–75°F (21–24°C) |
| Week 6 | about 65–70°F (18–21°C) |
The weekly drop isn’t superstition. A chick’s down gives way to feathers over these same weeks. The bird that needed 95 on day two cooks at 95 in week four. So the chart tracks the bird, not the calendar. That’s why the rows above say about. Don’t feel like counting weeks by hand? Enter your hatch date in the brooder temperature chart tool and it finds your row for you.
Where the thermometer goes
This is where most brooder problems start. Penn State puts it in one line: “Always measure the temperature at the chick’s level, directly under the heat source.”
A thermometer clipped to the brooder wall reads the room, not the brooder. Chicks live in the bottom two inches of it. That reading can be far off from what they’re actually standing in. Far enough to send you adjusting a brooder that was already right.
eXtension turns “chick level” into a number you can actually set: two inches above the floor, under the edge of the heat source. Which is exactly those bottom two inches the wall thermometer keeps missing.
The classic setup underneath a radiant plate has its own version of this. One starter on BackYardChickens set a plate to what the dial called 130 degrees. Then they slid a thermometer under it. The thermometer said 89.9. The chicks huddled under the plate anyway.
“The chicks have now been huddled under it for 3 hours with no desire to come out.”
The first reply asked the question that solved it: are the chicks actually making contact? Plate heat transfers by touch. The dial describes the plate surface. The thermometer describes air the chicks only pass through. Neither number is the one the bird feels. The bird feels the underside of that plate.
One more tool worth having: a high/low thermometer. Penn State recommends one for the first six weeks, when cold nights do more damage than steady coolness. It records the overnight floor of your garage brooder. No more guessing at 2 a.m.
Radiant heat doesn’t warm the air
Here’s the rule that makes sense of everything above, straight from eXtension: “Because radiation from an infrared lamp does not warm the air but only the objects at which it is directed, measuring air temperature is not a good indication of bird comfort.”
Read that again. Radiant heat warms surfaces: chicks, bedding, the floor of the brooder. The air between is mostly a bystander. So:
- Under a heat lamp, adjust by height, not by chasing degrees. Start the lamp at least 18 inches above the bedding, hung by chain or wire, never by the cord. Raise it about 2 inches a week, to a maximum of about 24 inches. Chicks running cold? Lower it, no closer than 15 inches, or add a second lamp. Those numbers, the porcelain-socket rule, and hanging the lamp so it can’t fall are all eXtension’s. Penn State adjusts a different lever, bulb size, and its clearance stands: at least 20 inches between lamp and anything flammable. Brooder fires are a real category of house fire. That’s what all these numbers are for.
- Under a heat plate, adjust by contact. The right height lets chicks press up under it and step out freely. Flatten under it and never leave? Raise an edge. Never go under? Lower it. The dial number is a starting point, not a target.
Both sources make the same backup argument: run two smaller heat sources, not one big one. Why? A single burned-out bulb in a cold snap is an emergency. Two sources make it a non-event.
Reading the chicks
Chicks vote with their feet, continuously, for free. Extension guidance treats them as the primary instrument. Learn the signals once:
- Spread evenly across the warm zone. Comfortable; this is the picture you want.
- Piled under the heat. Cold, and not slightly: a real pile means act tonight.
- Pressing as far from the heat as possible. Too hot, or no escape route. Give them room to get away before you cut the heat.
- Huddled away from the heat, in a tight knot at the far edge? That’s not a temperature problem. Penn State flags this pattern as a draft: the chicks are avoiding moving air, not the heat source. Blocking the draft fixes it. Adding heat doesn’t.
There’s also a physical check for the mornings when behavior is ambiguous. Pick up a couple of birds and feel their legs. This is the triage keepers use: legs that feel cold on bird after bird mean the heat isn’t reaching them, whatever the thermometer says. Warm them and fix the setup. And a chick that stays hunched and lethargic once it’s warm again has stopped being a temperature question. That bird needs a vet, not another five degrees.
And the soundtrack. Constant loud distress peeping is the one signal every keeper learns first. Quiet chicks, sleeping in the open? That’s a brooder that’s right.
When the heat comes off
The exit has two conditions. Only one of them is on the chart.
Feathers, first. eXtension says to keep heat until chicks are well feathered, and warns that pulling it too early invites respiratory problems. Down doesn’t insulate; feathers do. Watch for the week the last fluff on their heads gives way to real feathers.
House temperature, second. Penn State’s endpoint: decrease by 5°F weekly “until the normal daily temperature is reached (62–65 degrees F).” If your brooder room holds 62–65 on its own, the heat source has nowhere left to sit. That’s the off-switch.
Then season bends both rules:
- Fall and winter broods get six weeks, minimum. eXtension is explicit about winter: keep heat on for the first six weeks, even for fully feathered birds. The reason is practical. It keeps the waterer from freezing. Order chicks in October and you’re signing up for exactly this.
- Summer runs the other way. Heat stress kills faster than chill. eXtension says keep brooding temperatures below 95°F in hot weather, and watch for panting.
The graduation test is simpler than any chart row: fully feathered birds, a room in the low 60s, and chicks that ignore the heat source when it’s on. Pull the plug on a mild afternoon, not at nightfall. Watch the first hour. Birds that shrug and keep scratching were ready.
Once they’re out of the brooder, the next constraint is room. The space math for full-size chickens is a different calculation, and it starts mattering the week they feather out.
FAQ
Do chicks really need 95°F for the whole first week?
No. 95 is the top of the starting band, not a floor to defend. The sources agree on 90–95°F under the heat source in week one, dropping about 5 degrees a week. Chicks that spread out evenly at 90 are fine. A thermometer fight to hold exactly 95 misses the point.
My chicks huddle, but the thermometer says 95. Which one is wrong?
Neither. Check the thermometer’s position first: at chick level, directly under the heat source, not the wall. Then check for a draft: chicks huddled away from the heat are avoiding moving air. Using a plate? Check contact. The dial number is the plate surface, and the chicks only get warm by touching it.
The heat plate dial says 130°F. Is that too hot for chicks?
That dial reads the plate surface. Not the air, and not the bird. Plate heat works by contact, and chicks self-regulate by ducking under and stepping out. Set the height so they can press against it and leave freely. Then let behavior, not the dial, tell you it’s right.
When can chicks live outside without any heat?
When they’re fully feathered and their coop’s normal temperature sits around 62–65°F. In fall and winter, keep heat on for a full six weeks from arrival, even for feathered birds. For the coop side of that move, including sizes, insulation and cold-weather details, see the cold-climate coop guide.
Best Brooder Starter Kits (2026): What's in the Box
Six brooder kits, listing by listing: what $99.99 gets you, which one is sold out, and when buying the parts costs less.
Heat Plate vs Heat Lamp for Chicks: The Brooder Decision, With the Electricity Math
Heat plates and heat lamps compared on fire risk, the temperature schedule chicks need, and the six-week electricity cost most comparisons skip.